...while I'm on a roll;) I thought I'd post a couple more ideas for these. For these ones I used the occasions alphabet stampset and the pennant parade & winter post ones. The blue one is embossed with the snowburst embossing folder and the other is frostwood lodge dsp. And the stocking is just dsp and the stocking punch:)
Wednesday, December 07, 2011
More Treats!
...while I'm on a roll;) I thought I'd post a couple more ideas for these. For these ones I used the occasions alphabet stampset and the pennant parade & winter post ones. The blue one is embossed with the snowburst embossing folder and the other is frostwood lodge dsp. And the stocking is just dsp and the stocking punch:)
Tuesday, December 06, 2011
Another Treat Container
Monday, December 05, 2011
Stocking Punch Card
The new stocking punch is so much fun, with or without the coordinating stampset. Here's I've built the 3 stockings on this card using the Holly Berry Bouquet dsp on a background of real red cardstock. I used linen thread to string them along and I embellished each with a mini jingle bell. The 'merry Christmas' sentiment comes from the contempo Christmas set. A very simple card, but so cute!
Sunday, December 04, 2011
Poinsettia Bookmark
I used a some real red cardstock and the fun flowers die to create this poinsettia bookmark. I finished it off by adding a Holly Berry Bouquet button, a mini jingle bell and little tag I made using the tiny tags stampet and punch along with the pines & poinsettias stampset. The bookmark is layered using dimensionals and attached to real red grosgrain ribbon and sprayed with vanilla smooch spritz.
Saturday, December 03, 2011
Another Sour Cream/Treat Container
Friday, December 02, 2011
Rosette Christmas Tree
...continuing my love of making rosettes, I made this little Christmas tree out of rosettes. Here's a link to the best source of measurements out there. Basically you make each rosette a quarter inch smaller than the last. I used up my stash of green dsps from the last couple of years so many of the papers used are retired...a great way to put odds and ends to good use!:)
Thursday, December 01, 2011
My Husband's Birthday:)
Yesterday was my husband's birthday, and we had a delightful day celebrating him:) He is such a fabulous husband and I love him even more today than ever!
This was the bday card I made for him. I used the following (all SU):
- cardstcok: crumbcake & basic black
- dsp: well worn
- beau chateau side notes
- crumbcake seam binding ribbon
- vintage brads
- vanilla smooch spritz
- vintage wallpaper embossing folder (for big shot)
Saturday, November 26, 2011
Open Sea Birthday
My father-in-law's birthday was last week, and he is a well-traveled man with many experiences and stories, so I pulled out my Open Sea stampset (from the previous mini) to make his card:) AND I learned that due to popular demand, Stampin' Up has decided to continue to make this stampset available even though the mini it was in has expired. Just look for item #123032 when you place your online order and take advantage of the online extravaganza while you are at it too!:))
(The sentiment BTW is from the Wordplay stampset that I mentioned in yesterday's post:)
Friday, November 25, 2011
Make & Takes from last weekend's Workshop:)
Last weekend was Hilary's workshop and I meant to post the pictures of the make & takes we did, but as I mentioned in my last post, I've been under the weather this week, so better late than never;) I apologize for the lighting in the pictures...daylight would have been better:)
Hilary and her guests are new to stamping and paper crafting, and Hilary requested we do Christmas themed projects, so I tried to keep the projects simple and Christmas-y but also use stampsets and supplies that can be used for more that the Christmas occasion.
The Christmas card we made used the Pennant Parade stampeset and Pennant Punch. This stampset can be used for birthday's, new babies, love, thank you's, just because AND Christmas:) I love it when a stampset is so versatile:))
The second make & take is a sour cream style treat container (with 3 cherry cordial hershey kisses inside:) It's made out of the frostwood lodge dsp and another versatile stampset, Word Play...I love how the 'tidings' sentiment fit perfectly in the ornament punch:))
Because of the current hostess special on, Hilary earned an additional $45 in free stuff at her workshop (in addition to normal hostess benefits). This hostess special lasts til December 15th, so be sure to contact me if you want to host a workshop and earn extra free stuff too!:)
Thursday, November 24, 2011
Christmas Keepsake Box
I have been sick all week with an upset stomach etc...and at the same time lots of pressure from my day job...I came home from work yesterday and went to straight to bed...and then I slept late today...and I'm starting to feel a bit better...so I decided to bolster my mood a bit and sit down (ginger ale in hand;) and just make something for fun, so here it is, my keepsake box:)
Stampin Up has a few of the boxes that are used as a base for this project available for purchase together with the paper and embellishments used (item #129024) all you need to add is your stamps, adhesives and inks/markers and voila! You can order yours at my website online (and take advantage of the online extravaganza at the same time:) or you can contact me to order one:)) This was such a fun project to make with Shelli & Sara:)))
Online Extravaganza
Online extravaganza is on until November 30th with Stampin' Up products discounted 20 to 60%. All you have to do is click on this link to go to my website and click 'shop now' to see what's on sale (sorted by discount offerred!) What's on sale? All sorts of things from stampsets to digital downloads to exclusive bundles of products and ribbons! They even have one of my FAVOURITE stampsets of all time on sale, Winter Post...it's on for 50% off...at just over $16 it's a steal!!:)
Saturday, November 12, 2011
It's Good to be the Hostess:)
Contempo Ornaments
This was the 2nd make n take/technique club project this week. As I said in the last post we were dong 2 techniques: glitter and rosettes. The glitter on these ornaments is rimmed around the rosette and it was applied using a 2-way glue pen.
As for the rosettes, they are 1 1/4" x 12" strips of DSP...I used first edition dsp on the first one and then decided to try holly berry bouquet on the second and determined I liked that better...so we used the holly berry in club:)
Recipe (all SU):
- holly berry bouquet and first edition dsp
- cherry cobbler and very vanilla cardstock
- cherry cobbler and wild wasabi classic ink
- contempo Christmas, pines & pointsettias and tiny tags stampsets
- medium scalloped circle die for bigshot
- snow burst embossing folder
- galaxy fine glitter in champagne
- cherry cobbler quilted satin ribbon
- mini vintage tags
Friday, November 11, 2011
This card is NOT going to fit in an envelope
This was the card make & take from last night's technique club. Our techniques were:
- rosettes AND
- glitter
On this post I'll explain the glitter technique used for this card (rosettes will be covered in the next post). I hope you can see the fine dusting of glitter on the finished card in the pics above...it's a nice finishing touch in person:)
I recently discovered when working with a Christmas Keepsake Box that an ingenious way to add glitter to a project is to LIGHTLY (I can't stress that enough) spray the project when you are finished with spray adhesive and then with a bit of glitter pinched b/t your thumb and index finger LIGHTLY sprinkle the project (again I stress LIGHTLY...you do not want to dump the glitter...you might just ruin your project). For this project we used the champagne galaxy fine glitter:)
Recipe (all SU):
- pines & pointsettias stampset
- holly berry bouquet and first edition dsp
- striped wide grosgrain ribbon
- real red cardstock
- real red, wild wasabi and early espresso stampin markers
- galaxy fine glitter
- corner rounder and decorative label punch
Thursday, November 10, 2011
Mini Christmas Keepsake Box
Today is our technique club and Jennelle is this month's hostess, so today's project is my little thank you to Jennelle as hostess:) Each time I try to make the hostess something with either a product or a technique I've been meaning to try or learn.
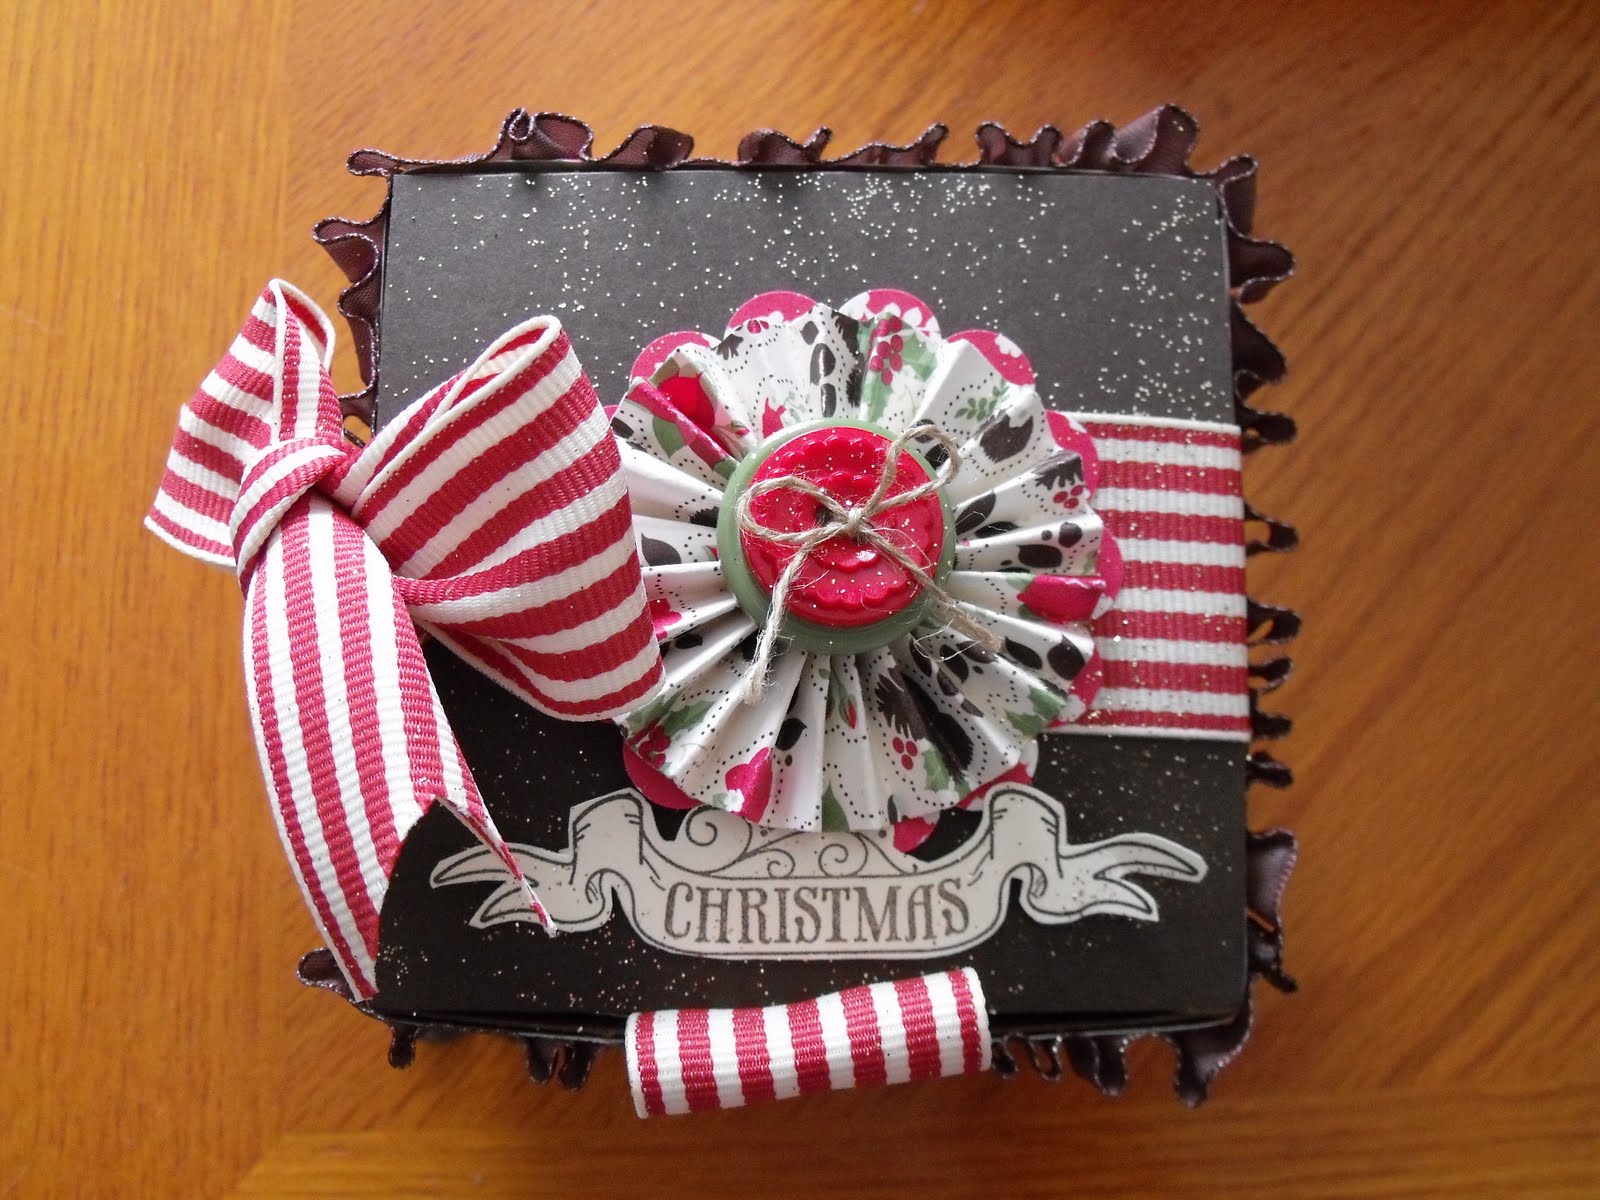
Today's project is made with one of the kraft gift boxes that are found on pg 15 of the Holiday Mini...they come 4 in a pack and I bought mine quite a while ago and then never got around to using them...until now;) I was inspired by the keepsake box that was a promotion a while back...and this is what I came up with.... and I used both of the techniques that we'll be working with at club tonight (rosettes and glitter...more on that when I post the club projects the next few days:)
Recipe (all SU):
- kraft gift box
- holly berry bouquet paper
- pines & poinsettias stampset
- early espresso cardstock & ink
- holly berry bouqet dsigner buttons
- wide striped grosgrain ribbon
- linen thread
- eyelet punch
- pearl jewel
- galaxy champagne fine stampin glitter
- scallop square die for big shot
- espresso taffeta ribbon
Monday, November 07, 2011
9th Anniversay
Today is our 9th wedding anniversary! ...and I love my husband even more than the day we said 'I do'. Unfortunately I have to work today (I made the card on the weekend and set it to post on November 7th because I wanted to post on the actual day). Hopefully I don't have to work late. It's also the provincial election day on our annivesary this this so we've decided to pick up supper and go out for a proper anniversary date on the weekend.
My inspiration for this card came from the Well Worn dsp which I purchased a while ago knowing Les (my hubby) would love it but I hadn't gotten around to using it. I also used one of the new frames embossing folders with my big shot on it.
Recipe (all SU):
Cardstock - not quite navy
DSP - well worn
Stamps - clearly for you
Embellishments - beveled window panes, frames embossing folder, cherry seam binding ribbon
Ink - early espresso & cherry cobbler
Sunday, November 06, 2011
Rosette Christmas Wreath
Because I have it hanging on our back door I can't seem to get a good picture with natural lighting as when I open the blinds the light of the window creates a shadow in the picture even though to my own eye standing there the colours are rich and stand out...so please bear with me on the quality of these photos.
As many of you who have been to workshops or classes with me lately know, I am in love with making rosettes or lollies ever since I got my Simply Scored tool...it's makes it to quick to do. My inspiration for this wreath came from page 6 of the Holiday Mini, but from the moment I started thinking about making a wreath I started thinking about the Frostwood Lodge Suite. I love the rich plaid so much. So while I think this looks much better in person, here is what I have come up with:)
If you don't already have one, you might want to add the Simply Scored tool to your Christmas wish list...that is, if you can wait!;)
Recipe (all SU):
Cardstock - cherry cobbler, verry vanilla, wild wasabi
DSP - frostwood lodge, first edition
Embellishments - vintage brads, holly berry bouquet buttons, smooch spritz
Ribbon - victoria lace & cherry cobbler seam binding
Stampset - Four the Holidays & Pines & Poinsettias
Ink - Versamark and black embossing powder for greeting & cherry cobbler for background
Friday, October 28, 2011
Free Digital Downloads for MDS November 4th - 7th!
That's right, I said FREE!! For all of you that have already purchased My Digital Studio (MDS) all you have to do is log onto MyDigitalStudio.net between Nov. 4-7 and and there will be 4 different downloads for free including a Home for the Holiday Christmas themed download, a photobook related download, a new brush set of sentiments for download and more. So be sure to get your free downloads and mark your calendar!!For those of you who haven't purchased MDS yet, now is a great time to do so and you too can get all the free downloads too on Nov 4 - 7th!
Monday, October 24, 2011
Witches Boots
I had originally taken a picture of it hanging in my house, but the detail didn't show up as well, so I sat it down on my workspace and retook the picture with the white background so oyou could see in case you wanted to make your own.
BTW instead of filling these with gumballs or jelly beans as some are doing, these are filled with score bites...yum! They fit perfectly:)
Recipe (all SU):
Cardstock - rich razzleberry, basic black
Ink - black
Dies - top note
Punches - stocking, 3/4 inch circle (and one circle smaller...punch doesn't say it's size), boho blossoms & word window
Ribbon - rich razzleberry taffeta
Tools - simply scored for rosetta
Embossing folder - snowburst
Embellishments - rhinestone jewels
Sunday, October 23, 2011
Peek-a-boo frame treats
Beau Chateau Project
A few weeks ago I posted this preview of the Beau Chateau class which I held yesterday. I remember saying it was a BIG one so we would keep it for a Saturday rather than a Thursday evening and we would start a half an hour early...well all in all it was a 5 hour class but everyone left with their project complete and smiles on their faces.
So I thought I'd share a few more pictures of the project to hopefully inspire you to make your own. This project was inspired by the Beau Chateau Suite in the current Idea Book & Catalog and my new Simply Scored tool...oh my, how easy it makes it to make boxes! Also I have seen these flowers on several blogs out there, so I sat down to figure them out one day and I love them! I used the medium (5 for the pink flower) and large (5 for the blue flower) flowers from the fun flowers die.
Recipe (all SU):
Stamps - elements of style and notably ornate
DSP - beau chateau
Cardstock - marina mist, early espresso, pretty in pink & very vanilla
Ink - early espresso, marina mist
Ribbon - very vanilla satin, chocolate striped grosgrain (which is now retired, but some of us also used the marina mist grosgrain and they were adorable too, but we used the chocolate satin ribbon to coordinate with this one), marina mist scallop dots ribbon (on some of the cards inside)
Punches - round tab, modern label & 1 " circle
Embellishments - antique brads & designer buttons
Other - spritzer tool
Tuesday, October 18, 2011
Sweet Pressed Cookie Stamp
A great new product from Stampin UP...I think I'm going to need to order some!! I've also heard that there are recipes included with the cookie stamps and that the shortbread are amazing! Available now until January 3, 2012
Sweet Pressed Cookie Stamps are a
brand-new Stampin' Up! product that will appeal to crafters and non-crafters,
alike-not to mention kids! What a wonderful unique gift!!
The
easy-to-use cookie stamp has a solid wood handle with three interchangeable
stamp images: a heart, a jack-o-lantern, and a snowflake. Food safe - dishwasher
safe!
Just make your favourite shortbread cookie dough (or one of the
two included recipes) and stamp away! Create beautiful, hand-stamped cookies in
a flash. The stamp images are completely food-safe and child-friendly.
Item # 125152 Price $20.95 Cdn.
Includes solid wood handle with
three interchangeable stamp images, two recipes, and tips for use
Here's a link to a short video so you can see what all the fuss is about.
Monday, September 26, 2011
Kindness Matters Bookmark
Kindness Matters was the first stampset in the new catty that caught my eye. I didn't have much time to craft this past weekend, but when I did sit down I couldn't help but reach for this pretty set to make this little bookmark for a friend. I also used the frame image from the Forever Young set and a key charm. Cardstock was natural ivory and wisteria wonder; ink was early espresso and wisteria wonder.
Saturday, September 24, 2011
Sweet Life
My husband is far too sweet:) I made this project (you might have to click on the image to see the detail) for a silent auction for friends of ours that are fundraising for a missions trip (along with a separate cardset). You'll recognize that it is a variation on what we did in September's class. Well, during the auction my husband didn't think the bid on it was high enough, so he added his own and actually ended up winning/buying my project and bringing it home. When I asked him why he did that he said:
- it was his favourite item in the auction (awe:)
- I keep giving what I make a way and he wanted this for his bedside table
- and that because I'm his sweetheart he has a 'sweet life' (the sentiment of the project).
So this now sits on his bedside table:) I love that man!:))
Sunday, September 11, 2011
Sneak Peek - Beau Chateau Class
Today I have a sneak peek for you of October's Beau Chateau class. This class has a lot in it, so I will be limiting the class size so that everyone can get their project completed in the time we have together. I have also moved the class from a Thursday evening to a Saturday afternoon to give us a bit more time since this project is BIG!
We'll be making a portfolio style sectioned stationary box that contains 3 compartments along with 6 greeting cards for in the largest compartment (envelopes included) and a small mini album for the second largest compartment. We'll be primarily using the new Beau Chateau DSP, which we'll be using a lot of! We'll also be primarily using the Elements of Style stampset (and a bit of Notably ornate). We'll also make 2 fancy flowers and play with lots of ribbon and embellishments AND the spritzer tool.

Registration will open on September 15th, so be sure to call or email me if you want to be on the list for one of the spots as they do tend to fill up quickly.
Here are the class details...
When: Saturday October 22, 2011 1:30 pm
Cost: $35 (we will be using a lot of DSP, ribbon and embellishments & this is a fairly large project, see list of what we're making above). However, I will discount the cost of the class by $5 for anyone who orders the Elements of Style stampset when they register...and then, you'll have your very own stampset to work with at the class and take home with you afterward:)
What to bring to class:
- scissors
- adhesive: glue runner, tombow mono multi (liquid glue), glue stick, sticky strip
- early espresso ink pad and sponge...we're going to be using this a lot!!
- paper piercing tool
- clear blocks if you preorder the stampset in clear
Sunday, September 04, 2011
Friend Card
Just a card I made this last week for a friend. The sentiment reads: "time passes' on the front...and inside it continues "friendship stays right where its put" and comes from the Curvy Verses stampset.
The whole idea for this card came from that clock which is part of the new 'Forever Young' stampset and I just thought it would be fun to layer and pop out the clock. Cardstock used was marina mist and naturals ivory. I also used the tulips border embossing folker, the boho blossoms punch and pearl jewels.
Saturday, September 03, 2011
Mini Technique Book
Our second project at technique club this week was this mini book with pockets to put the techniques we play with at each meeting. The book is made out of the scallop envelope die for the bigshot cutout of crumbcake cardstock. The word 'create' is black embossed on the cover and the cover is finished off with flocked black dsp from the mocha morning pack, the new cherry cobbler scallop dotted ribbon and a flower made with the smalled flower from the fun flowers die. For the flower you cut one flower out and crumple it up and then work it with your bone folder until you break down the fibers enough to separate the flower into 2 layers...this is what gives you that suede/brushed softer look. The flower was finished off with a black medium flower from the boho blossoms punch and a rhinestone brad. I chose to use this flower technique on the cover because I was asked about it by a couple of the girls in the group, so it was a bit of a bonus technique of sorts;) The stampset used on this project was the Creative Elements one which is quickly becoming a new favourite for me because it is so versatile!:)
Friday, September 02, 2011
Established Elegance/Faux Metal
On this card from last night's technique club we worked with the 'faux metal' technique of embossing. You press your cardstock into versamark and then cover it with embossing powder and heat set it, then repeat 3-4 times and then you press your stamp (preinked in versamark) into the hot embossed cardstock to create the impression that ends up looking like faux metal!
I knew I wanted this to be one of our projects when I saw the new holiday mini that started on September 1st where Stampin Up introduced its new pewter embossing powder. From the second I got my preorder I had to play with it and there are several images in the Established Elegance stampset that was used on this card that work beautifully with this technique!
Supplies used on this card include (all SU):
- cardstock: early espresso, very vanilla, cherry cobbler
- ink: early espresso, cherry cobbler, always artichoke, versamark
- dsp: first edition
- ribbon: chantilly lace, always artichoke seam binding
- punches: 1 1/4" cirlce & boho blossoms punch
- big shot: scalloped circles die & frames impressions folder
- pearl jewels:)
Thursday, September 01, 2011
Pin Cushion Hostess Gift
Tonight marks the start of my new technique club and Ruth is tonight's hostess. I thought I'd make each month's hostess a little something for their month and this is what I came up with for Ruth. I decided I needed to stretch myself and come up with something I'd been meaning to try or learn in what I made the hostess, and I've been meaning to craft more with fabric, so from there came the inspiration for this project. That and I had just received the new beau chateau designer fabric and was in the love with it, and I thought Ruth would be too since she loves all things vintage:) The 'create' tag was stamped by using markers and I'd been wanting to combine those 2 stamps (the frame and sentiment) from the Creative Elements stampset ever since I first saw that in a sneak peek from the Stampin Up cruise that some of my fellow demonstrators earned. All the fabric elements for this project were cutout with the Big Shot (scallop square die and circle scallops die) and the cushion was stitched together by hand with linen thread. I finished it off with a pin with pearls and other pretties from the retired pretties kit and I added some chantilly lace, rhinestone jewels and pin from the vintage trickets pack (all available in the current catalog:)
This month's technique is embossing and I'll be back tomorrow and the next day to show you our projects, so come back tomorrow if you want to see 'faux metal' embossing:))
New Holiday Mini Catalog
The new Holiday Mini starts today. You can click here (and then select Holiday Mini) to see it online, but if you want to see if in person, contact me and I'll get you one!:) ......there will be a live link to the mini added to my sidebar once it goes live sometime on the 1st too:)There are so many new and exciting things in this mini, like:
- the new Simply Scored Tool...I preordered mine and it is brilliant! (You'll have noticed in last weeks posts I was playing with it:))
- new stocking punch and coordinating stampset!
- gorgeous Christmas designer series papers...2 wonderful varieties (one with coordinating fabric) and both with coordinating stampsets!
- lots of fall and hallowe-en goodies
- a stocking die for the big shot!! I'm already playing with mine!
- jingle bells to tie on you projects, just too cute!
- how about the mica snow flakes?!!
- or the shaker frames?! (shaker cards have never been easier!)
- big beautiful buttons:)
- velvet stitched ribbon and quilted satin ribbon (this is not good, I already have a ribbon addiction!;)
- winter wishes stitched felt...the mittens are too cute!!
- pewter embossing powder (check out my blog tomorrow to see how I'm using this!)
- peek-a-boo frames bigshot die (how on earth am I going to watch my budget?!)
- stampin card keeper (why don't we all order one and then get together for an afternoon to decorate them?!! ...I mean it, call me up if you wanna:)
- lots of new digital downloads and content
- the prettiest new stampset called "You are Loved":)
- dazzling details glitter glue (and the glimmer paper is back too!)
- "The Sounding Joy' stampset...perfect for embossing or ornament making even...beautiful!
AND I have missed items on the list above, so you'll need to go and check out the new Holiday Mini on my Stampin Up website and discover what your favourites are!:)
Monday, August 29, 2011
Back To School Desk
Sorry this is not a great picture...it's at least 3X cuter in person...the morning light when I took the picture was too bright for the window sill.
This project uses 6 of the matchbox dies from Stampin Up. The purple is because that seems to be my daughter's favourite colour these days. The stampset I used is the strength & hope stampset that benefits a great cause and is only available until August 31, so if you don't have your yet, be sure to place your order before the end of the month.
In each of the drawers I have placed some chocolate and a challenge & blessing for the year ahead for my girl. As in prior years I placed this in her place at the dining table the night before so she discovers it at breakfast on her first day:)
Wednesday, August 24, 2011
Kindness Matters Pocket
I love this stampset. It was one of the first ones on my wishlist when the new catalog came out. Kindness (truly does) Matter!!
On today's pocket I used crumbcake, island indigo & very vanilla cardstock along with the new triple layer blossom punch and the scallop border punch and a piece of hemp twine.
The jury is still out on the petite pocket die...I'm loving these little pocket envelopes so I might just have to have it, but I'm also loving my new simply scored which certainly simplies the process of re-engineering a project!;)
Subscribe to:
Posts (Atom)