Saturday, November 26, 2011

Open Sea Birthday


My father-in-law's birthday was last week, and he is a well-traveled man with many experiences and stories, so I pulled out my Open Sea stampset (from the previous mini) to make his card:) AND I learned that due to popular demand, Stampin' Up has decided to continue to make this stampset available even though the mini it was in has expired. Just look for item #123032 when you place your online order and take advantage of the online extravaganza while you are at it too!:))

(The sentiment BTW is from the Wordplay stampset that I mentioned in yesterday's post:)

Friday, November 25, 2011

Make & Takes from last weekend's Workshop:)


Last weekend was Hilary's workshop and I meant to post the pictures of the make & takes we did, but as I mentioned in my last post, I've been under the weather this week, so better late than never;) I apologize for the lighting in the pictures...daylight would have been better:)

Hilary and her guests are new to stamping and paper crafting, and Hilary requested we do Christmas themed projects, so I tried to keep the projects simple and Christmas-y but also use stampsets and supplies that can be used for more that the Christmas occasion.

The Christmas card we made used the Pennant Parade stampeset and Pennant Punch. This stampset can be used for birthday's, new babies, love, thank you's, just because AND Christmas:) I love it when a stampset is so versatile:))

The second make & take is a sour cream style treat container (with 3 cherry cordial hershey kisses inside:) It's made out of the frostwood lodge dsp and another versatile stampset, Word Play...I love how the 'tidings' sentiment fit perfectly in the ornament punch:))

Because of the current hostess special on, Hilary earned an additional $45 in free stuff at her workshop (in addition to normal hostess benefits). This hostess special lasts til December 15th, so be sure to contact me if you want to host a workshop and earn extra free stuff too!:)

Thursday, November 24, 2011

Christmas Keepsake Box


I have been sick all week with an upset stomach etc...and at the same time lots of pressure from my day job...I came home from work yesterday and went to straight to bed...and then I slept late today...and I'm starting to feel a bit better...so I decided to bolster my mood a bit and sit down (ginger ale in hand;) and just make something for fun, so here it is, my keepsake box:)

Stampin Up has a few of the boxes that are used as a base for this project available for purchase together with the paper and embellishments used (item #129024) all you need to add is your stamps, adhesives and inks/markers and voila! You can order yours at my website online (and take advantage of the online extravaganza at the same time:) or you can contact me to order one:)) This was such a fun project to make with Shelli & Sara:)))

Online Extravaganza

Online extravaganza is on until November 30th with Stampin' Up products discounted 20 to 60%. All you have to do is click on this link to go to my website and click 'shop now' to see what's on sale (sorted by discount offerred!)

What's on sale? All sorts of things from stampsets to digital downloads to exclusive bundles of products and ribbons! They even have one of my FAVOURITE stampsets of all time on sale, Winter Post...it's on for 50% off...at just over $16 it's a steal!!:)

Saturday, November 12, 2011

It's Good to be the Hostess:)


Hostesses have the opportunity to earn up to $45 in extra free stuff (on top of the existing hostess benefits!) when you decide to book a workshop. Offer runs from now until December 15th. Some dates are filling up, so contact me today if you want to book a workshop:)

Contempo Ornaments


This was the 2nd make n take/technique club project this week. As I said in the last post we were dong 2 techniques: glitter and rosettes. The glitter on these ornaments is rimmed around the rosette and it was applied using a 2-way glue pen.

As for the rosettes, they are 1 1/4" x 12" strips of DSP...I used first edition dsp on the first one and then decided to try holly berry bouquet on the second and determined I liked that better...so we used the holly berry in club:)

Recipe (all SU):
- holly berry bouquet and first edition dsp
- cherry cobbler and very vanilla cardstock
- cherry cobbler and wild wasabi classic ink
- contempo Christmas, pines & pointsettias and tiny tags stampsets
- medium scalloped circle die for bigshot
- snow burst embossing folder
- galaxy fine glitter in champagne
- cherry cobbler quilted satin ribbon
- mini vintage tags

Friday, November 11, 2011

This card is NOT going to fit in an envelope


This was the card make & take from last night's technique club. Our techniques were:
- rosettes AND
- glitter

On this post I'll explain the glitter technique used for this card (rosettes will be covered in the next post). I hope you can see the fine dusting of glitter on the finished card in the pics above...it's a nice finishing touch in person:)

I recently discovered when working with a Christmas Keepsake Box that an ingenious way to add glitter to a project is to LIGHTLY (I can't stress that enough) spray the project when you are finished with spray adhesive and then with a bit of glitter pinched b/t your thumb and index finger LIGHTLY sprinkle the project (again I stress LIGHTLY...you do not want to dump the glitter...you might just ruin your project). For this project we used the champagne galaxy fine glitter:)

Recipe (all SU):
- pines & pointsettias stampset
- holly berry bouquet and first edition dsp
- striped wide grosgrain ribbon
- real red cardstock
- real red, wild wasabi and early espresso stampin markers
- galaxy fine glitter
- corner rounder and decorative label punch

Thursday, November 10, 2011

Mini Christmas Keepsake Box


Today is our technique club and Jennelle is this month's hostess, so today's project is my little thank you to Jennelle as hostess:) Each time I try to make the hostess something with either a product or a technique I've been meaning to try or learn.

Today's project is made with one of the kraft gift boxes that are found on pg 15 of the Holiday Mini...they come 4 in a pack and I bought mine quite a while ago and then never got around to using them...until now;) I was inspired by the keepsake box that was a promotion a while back...and this is what I came up with.... and I used both of the techniques that we'll be working with at club tonight (rosettes and glitter...more on that when I post the club projects the next few days:)

Recipe (all SU):
- kraft gift box
- holly berry bouquet paper
- pines & poinsettias stampset
- early espresso cardstock & ink
- holly berry bouqet dsigner buttons
- wide striped grosgrain ribbon
- linen thread
- eyelet punch
- pearl jewel
- galaxy champagne fine stampin glitter
- scallop square die for big shot
- espresso taffeta ribbon

Monday, November 07, 2011

9th Anniversay


Today is our 9th wedding anniversary! ...and I love my husband even more than the day we said 'I do'. Unfortunately I have to work today (I made the card on the weekend and set it to post on November 7th because I wanted to post on the actual day). Hopefully I don't have to work late. It's also the provincial election day on our annivesary this this so we've decided to pick up supper and go out for a proper anniversary date on the weekend.

My inspiration for this card came from the Well Worn dsp which I purchased a while ago knowing Les (my hubby) would love it but I hadn't gotten around to using it. I also used one of the new frames embossing folders with my big shot on it.

Recipe (all SU):
Cardstock - not quite navy
DSP - well worn
Stamps - clearly for you
Embellishments - beveled window panes, frames embossing folder, cherry seam binding ribbon
Ink - early espresso & cherry cobbler

Sunday, November 06, 2011

Rosette Christmas Wreath


Because I have it hanging on our back door I can't seem to get a good picture with natural lighting as when I open the blinds the light of the window creates a shadow in the picture even though to my own eye standing there the colours are rich and stand out...so please bear with me on the quality of these photos.

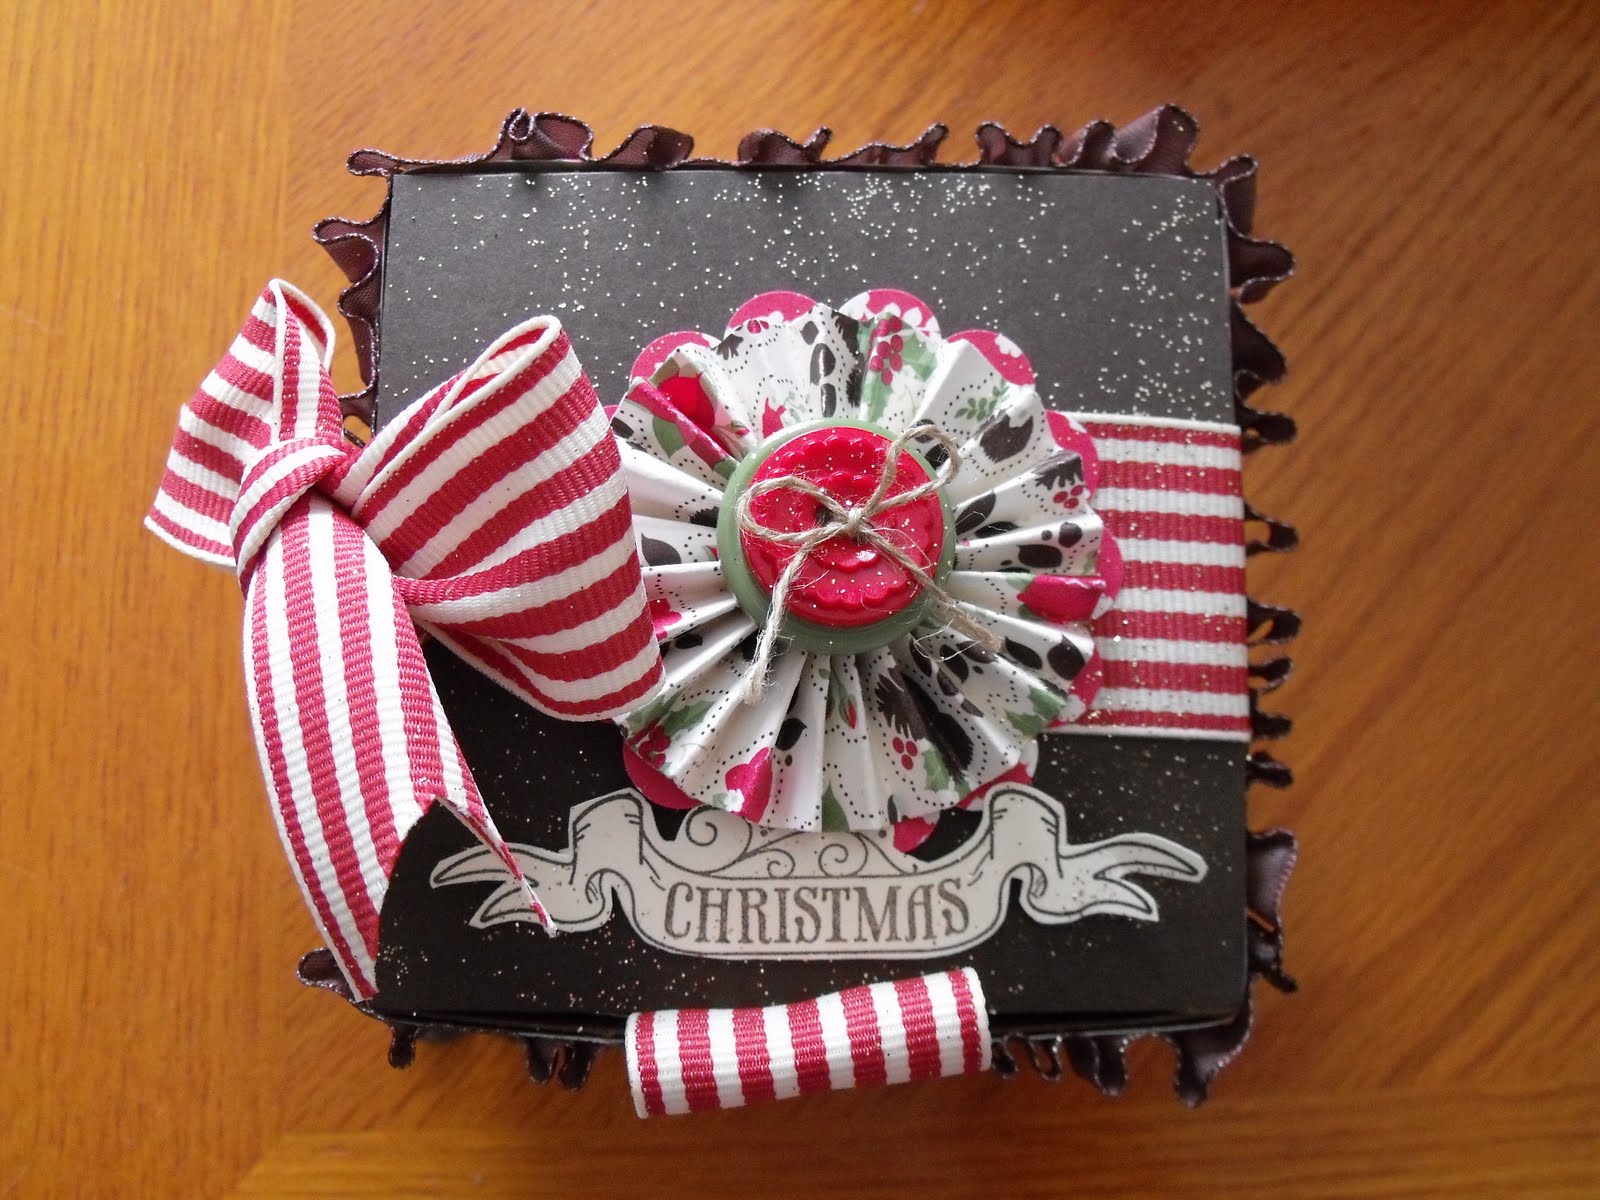
As many of you who have been to workshops or classes with me lately know, I am in love with making rosettes or lollies ever since I got my Simply Scored tool...it's makes it to quick to do. My inspiration for this wreath came from page 6 of the Holiday Mini, but from the moment I started thinking about making a wreath I started thinking about the Frostwood Lodge Suite. I love the rich plaid so much. So while I think this looks much better in person, here is what I have come up with:)

If you don't already have one, you might want to add the Simply Scored tool to your Christmas wish list...that is, if you can wait!;)

Recipe (all SU):
Cardstock - cherry cobbler, verry vanilla, wild wasabi
DSP - frostwood lodge, first edition
Embellishments - vintage brads, holly berry bouquet buttons, smooch spritz
Ribbon - victoria lace & cherry cobbler seam binding
Stampset - Four the Holidays & Pines & Poinsettias
Ink - Versamark and black embossing powder for greeting & cherry cobbler for background