Monday, October 14, 2013

Mosaic Madness Christmas

While I was playing outside of the box on the weekend, I pulled out my Mosaic Madness stamp set and punch and paired it with the Sweet Essentials greetings and came up with this ornament Christmas card idea.  I love it when you get a lot of mileage out of a stampset and I love to find ways to use good basic supplies and stamps for any occasion and that is exactly what happened here.  I've been experimenting with making ornaments out of snowflakes (using the festive flurries bundle...see more thoughts/ideas on that in the days to come on this blog:)....and as I was experimenting I started looking at the idea of folding and combining symmetrical images to create ornaments...and from there these ornaments made with Mosaic Madness were born.  And an ornament needs a ribbon and a string don't you think?!  I think it turned out pretty cute, though if I had it to do again I would stamp the green background piece before forming the ornaments onto it, but since I was experimenting at the time, I didn't know where I was going, and I thought I'd just share with you the raw idea.  If you try it yourself, please let me know...I'd love to see what you come up with too!:)

Sunday, October 13, 2013

Vintage Christmas - a new colour palette

The colours for this Christmas card see at first very non-traditional, but I was inspired by some vintage Christmas ornaments...see this link!  In fact, it isn't non-traditional at all to use pinks and turquoise along with golds  in vintage Christmas vingette's at all.  I'm not thrilled with the final version of this card...I think it needs to be shiny-er.  It's prettier in person that the picture captures, but I feel like I could have pushed it just a bit further, but that is all part of the process...we create...and we re-create...and things evolve and take a life of their own.

I'm probably more of a red & green girl at Christmas, but it's far enough away to experiment and create outside of the box a bit;)

Stamp sets used on this card were:  Calm Christmas & World Map

Saturday, October 12, 2013

Up-cycle your old Holiday & Occasions Catalogs!

I made this little Halloween gift bag from pages from last year's holiday catalog.  I saw the idea to upcycle them from another demonstrator and then today I came upon this video from yet another demonstrator that makes it very easy, so I thought I'd share the link here.  My tag was made with the Tags 4 You stamp set & coordinating punch.

Monday, October 07, 2013

Pop & Place

Here's a preview:

Sunday, October 06, 2013


Stampin Up's new Pop & Place Holiday Gift Tags come in a booklet of 70+ tags in five designs--created from our existing punch and die shapes. These tags (which coordinate with the Season of Style products in the 2013 holiday catalog) are perfect for anyone wanting to make cute quick tags, even for new customers who may not know what punch or die shapes they are interested in just yet:) 

There are a few different options to choose from depending on your needs:
ItemDescription
134975Pop & Place Holiday Gift Tags Book   $11.95
134623Christmas Tagables Photopolymer Stamp Set  $16.95
 
135921


Pop & Place Holiday Gift Tags Bundle includes   $22.95
  • Pop & Place Holiday Gift Tags Book 
  • Christmas Tagables Photopolymer Stamp Set


135290


Pop & Place Holiday Gift Tags Starter Bundle includes  $27.95
  • Pop & Place Holiday Gift Tags Book 
  • Christmas Tagables Photopolymer Stamp Set
  • Soft Suede Classic Stampin' Spot
      • Clear Block C                                                                  

Saturday, October 05, 2013

World Card Making Day!

Today is World Card Making Day, and so you know I had to make a card, or two...  Actually, I have a number of other responsibilities today, so I didn't have the time to create all the things in my head, but I did sit down to make this card today to send to some wonderful friend who are going through a difficult time. 
 
So this is today's card (got some inspiration from Monica Vale:)  On this card I used the following stamp sets:  Layered Labels, Blessings from Heaven & Feeling Sentimental (I also used one of the single stamps from the first Paper Pumpkin kit).  The dsp comes from the Modern Medley pack (and the coordinating envelope was made from paper in the in color dsp stack).  In colors were Baked Brown Sugar & Basic Black.

I'd love to see what cards you made on world cardmaking day so be sure to post a link in the comments below or share with me on Facebook:)

Thursday, September 26, 2013

Playing around with Christmas Card Ideas for this Year!

I made about 6 prototypes of what I'll send as our family Christmas card this year and this is my favourite so far.  I used the new script embossing folder along with the Calm Christmas stampset.  Also the background of the focal point was made using the Dictionary background stamp & the this & that rotary stamp.  I also used the new Christmas washi tape on this card.

Tuesday, September 24, 2013

Chalk Talk Butterfly Card
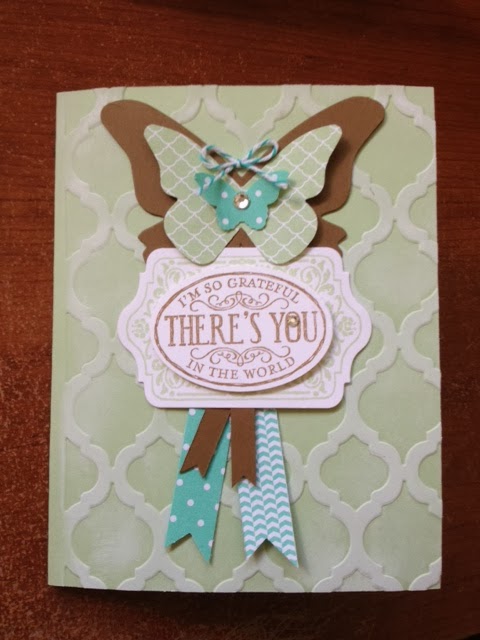

I made this card recently using the Chalk Talk stamp set and coordinating framelits.  I also used the butterfly dies for the big shot AND the itty bitty butterfly punch that is on special this month.  The dsp comes from the in colours stack, and the base of the card is a piece of pistaccio pudding cardstock embossed with the mosaic folder and then inked with some craft white ink.

Monday, September 23, 2013

Notable Notions Anniversary Card

I made this card for my aunt & uncle's 50th anniversary last month.  The numbers were cut out of the gold glimmer paper with the big shot dies.  The stamped images come from the Notable Notions Stamp Set along with the Apothecary Accents one and the greeting comes from Itty Bitty Banners.

The butterfly is one of the images in the Papillon Potpouri stampset and it was punched with the coordinating punch.  The punch & stampset are on special this month as a bundle for 15% off!

The card was finished off with some baked brown sugar ruffled trim and some of the simply pressed clay flowers.

Sunday, September 22, 2013

Ribbon Jars - Chalk Talk


I made these little jars of ribbon for each of the ladies in my Stampin Club as a thank you for joining.  Each is filled with the in colour ruffled trim.  The jars were decorated with paper doilies and in colour dsp.  I also used the chalk talk stamp set and coordinating framelits along with both of the butterfly punches (just a few days left for the papillon potpourri/butterfly punch bundle special to get yours!)

Friday, September 13, 2013

Club Project #2 - Thanksgiving Card

This was our second project at yesterday's club.  The base of the card is baked brown sugar cardstock and then the inner piece is summer starfruit which I stamped using the dictionary background stamp (stamped off once first).  Then I stamped the 'secret of life...' stamp from the From the Heart stampset in backed brown sugar on the right over top.  The dsp strip on the bottom comes from the Soho Subway dsp.  The focal point of the bottom is a popped up thanksgiving image from the Tags 4 You stamp set bundle (stamped in summer starfruit) and embellished with the 3 flowers from the Boho Blossoms punch and a vintage trinket brad.  The card was finished with Victoria lace trim.

50 New Items on Clearance Rack & HOSTESS CODE

Stampin Up added 50 new items to the clearance rack yesterday...only available while quantities last!  You can click 'shop now" on my right side bar ---> to shop online.

Here's a link to the new items LINK

ALSO, if you are placing an order online today or tomorrow, please use the following hostess code:  UVYVRXSX

Thursday, September 12, 2013

Club Project #1 - Journal

Today's project is our first fall club project.  It's a repurposed journal I picked up some board book journals on clearance for around a dollar at Michael's month's ago...not liking the images on them with this purpose in mind).

I used the world map background stamp as the focal point for this journal and Postage Collection hostess set for the other images.  I also used a Boutique Details embellishment in coastal caban on the bottom right and some of the striped chevron ribbon (love working with this!).  The spine of the book was covered in Modern Medley dsp....and voila 'priceless dreams'!:)

Friday, September 06, 2013

Tags 4 You - Thanksgiving

I made this thankgiving card using the Tags 4 You bundle.  I also used the label image from the Everyting Eleanor for the espresso stamped background for the 'happy thanksgiving' image.  The background of the card was stamped with the dictionary background stamp (love it).  The tails were made of dsp from the Afternoon Picnic pack (I know, it doesn't look at all like it's from that collection, does it?  See you can adapt products and make them your own;)  And the espresso tail is just a piece of coordinations cardstock embossed with the woodgrain folder and then sanded.

Sunday, September 01, 2013

Brand New Today ** Envelope Punch Board

Available starting September 1st...that's today!!  Stampin Up has introduced the envelope punch board which can make custom envelopes for over 60 different sizes and shapes.  Even better than using your diagonal scoring board, this tool notches the edges for you and also doubles as a corner rounder!  Want to learn more, watch this video!!

Tags 4 You - Treat or Treat!


I made this little 'treat' jar using the Tags 4 You stamp set from the Holiday catalog.  The set has this image, a Christmas one, a thanksgiving one and a valentine's one - talk about an affordable way to hit the occasions that crafters often make cards, treats or gifts for!  I used washi tape from the This or That line to trim the jar (see the calypso coral piece) and also some of the coordinating dsp on the bow.  The black and vanilla dsp come from my new favourite Modern Medley dsp pack (love it!).  Also the 'treat or treat' tag is popped up on an image I stamped using Chalk Talk (and cut out using the coordinating frameit).  The button on the very top is from the Designer Very Vintage collection.

Saturday, August 31, 2013

Tags 4 You - Christmas

I know that it's a little early for Christmas, but when I received my Tags 4 You bundle and the new Christmas washi tape from the Holiday catalog, I couldn't resist making this simple Christmas card!  Ladies, are you not in love with washi tape?!  I think this is just the ticket for mass producing an adorable Christmas card in a hurry!!

Friday, August 30, 2013

August Paper Pumpkin

I received my paper pumpkin for August last week and these were the cards I made with this month's kit.  All of them are different than the sample and instructions included.  I just loved that little bicycle stamp in this months kit, I couldn't resist playing with that and the banners!  Also this month's kit was perfect timing as the sentiment was 'thank you' and my daughter had to write some thank you cards for grad gifts and gifts toward university, so she used my paper pumpkin cards to help her finish these off:))

Thursday, August 29, 2013

Butterfly Special - August 29th to September 30th!


Starting today!  If you look through a sampling of my recent projects, you'll notice that I'm crazy about butterflies these days!  If you haven't gotten your bitty butterfly punch or the larger more elegant one, here's an opportunity to get one and save!  From now until September 30th, you can choose to get either of these punches together with the Papillon Potpouri stamp set for 15% off!!  I love how SU let you choose either punch too! Click on details in chart above to see pricing information.

Sunday, August 25, 2013

World Map Meets Postage Collection

I was playing with an inking technique on this card using some pool party, costal caban and midnight muse inks, then stamping the *new* World Map background stamp in black over it.  I *love* that World Map stamp...it's definitely one of my new favourites...as are the Pretty Print embossing folder (used on the black background matt) and the Postage Collection *new* nostess stamp set.

Oh and one more thing I'm loving working with is that black & white chevron ribbon.  I used it yesterday too and forgot to mention...it is so easy to tie knots and bows with!:)

Saturday, August 24, 2013

Congratulations Card - Postage Collection

I made this card this week for a former colleague of mine who received a promotion.  Unfortunately when I went to the celebration for her yesterday, no one was there.  I guess the time was changed.  I would have used less heavy/bulky embellishments if I had known this might have to go in the mail;)

I used a few of my new favourite things here:
-Postage Collection **hostess** stamp set
-Modern Medley designer series paper
-and from the *new* Holiday catalog, Pretty Print texture impressions embossing folder!

I also used some Victoria lace, antique brads, a library clip, some linen threat, marina mist card stock and ink, very vinalla cardstock, black ink, the postage stamp punch & the apothecary accents framelits.

(Click on image to see larger scale)

Monday, August 05, 2013

Holiday Stamp Sets Carried Over

With the recent release of the Holiday Catalog, I thought I'd remind you also today which Holiday stamp sets have carried over from the prior catalog.
Also the coordinating Christmas punch pack has carried forward, and, of course, the framelits that go with the ornament stamps above.

Thursday, August 01, 2013

2013 Holiday Catalog Goes Live TODAY!

...and here's a link:
     pdf
     flipbook

Monday, July 29, 2013

Stamp Camp - Project 3 - Notepad/card Folio

This folio was our third project at stamp camp.  The cover was decorated with the new Shop Around Wheel and the Notable Notions stamp set.  The base is made with baked brown sugar card stock and the dsp comes from the Soho Subway pack.  The binding is trimmed with the new ruffle stretch trim also in baked brown sugar.


Inside we put a notepad and made a pocket and some notecards/postcards and one greeting card.  The idea is that each of us can use our folios to keep track of cards and notes that need to be sent or other to do's and to keep a few notecards handy with maybe even some stamps in the pocket

We used the Post Card background stamp for the card and notecards and the accents were done with the Postage Due stamp set.  We also used the coordinating postage punch.

Sunday, July 28, 2013

Stamp Camp - Project 2 - Gift Box


For our second project we used the Tag a Bag Gift Boxes to make this gift box that can fit anything from a t-shirt to candles to chocolate to baking...well lots of different things.  The boxes come with acetate sleeves that slide on and off.  We decorated with the Tag a Bag Accessory  kit along with a little bit of Baked Brown Sugar dsp from the in color dsp stack.  The stamp set we used was A Fitting Occasion which is on page 86 of the annual catalog and is so versatile and I think works perfectly with tags!

Saturday, July 27, 2013

Stamp Camp - Project 1...a closer look...Incolor Card Pocket with Coordinating Cards!

I thought I'd give you a closer look at the cards in project 1.  First we made a card pocket/stationary holder out of a piece of 12x12 dsp.  Then we made each of these four cards for within the pockets.


Supplies used:
2013/14 In color dsp stack
Chalk talk stamp set and framelits
Sweet Essentials stamp set
Butterfly punches (both)
Rhinestone jewels
Bakers twine
In color ink pads
Tulips frame embossing folder
Paper doily (cover)

Stamp Camp is TODAY! - Project 1


My summer stamp camp is today and I'm running around this morning setting up the table and projects, the cupcakes and refreshments, but I thought I'd take a moment and give you a peek at the first project we'll be making.  I'll give you a few more pictures later today and in the days to come of all the projects.

This project features the designer series paper stack in the 2013/14 in colors as well as the Chalk Talk stamp set and coordinating framelits. We'll also be using the Sweet Essentials stamps set - such a versatile set of greetings. 

The card folio above was made out of a piece of 12 x 12 dsp. You fold it in half one way and then in half the other way and then you snip off the areas shown.  If you want a tutorial ,
Dee Slater has one here.  Hers is different than mine, but it will help you visually get the base of it if my instructions above weren't clear.

Sunday, July 14, 2013

Anniversary Card
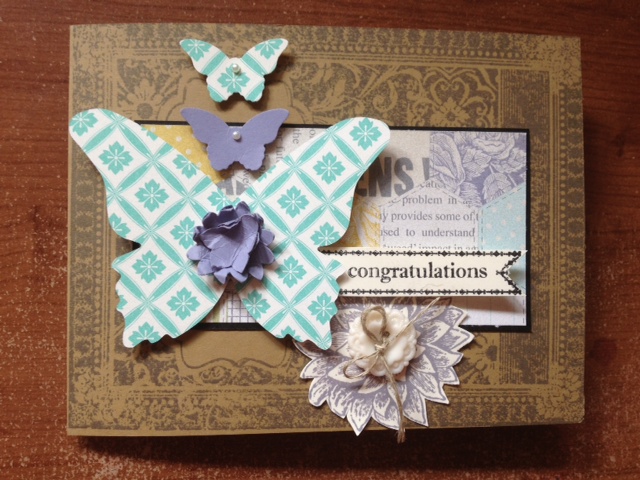
Today is a special anniversary of our pastor & his wife so I wanted to make a card for them.  I was inspired on this card by one that Shelli did back at the south pacific convention - hers used bright colors (orange or yellow I think and a very Bollywood looking stamp image), but I liked the layout and drew inspiration there:)

Stamp sets used on this card were:  Ex Libris, Banner Greetings and Creative Elements.  I also used the Afternoon Picnic DSP.

Saturday, July 13, 2013

Bonne Bastille!

Tomorrow (July 14th) is Bastille Day in France.  I thought the occasion totally called for the flags and banners in the Hearts a Flutter stamp set (with coordinating framelits).  I finished this project off with Collage Curior (which sadly retired at the end of this year's Spring catalog, but some stamp sets are so nice, you just can't let them go:)

Thursday, July 04, 2013

Afternoon Picnic - Tea Bag Holder


This cute little tea bag holder/card is made out of Afternoon Picnic DSP.  You will need 2 pieces of dsp of your choosing to make this project as follows:
- one piece 3 1/2 x 6 3/4" (score at 3 1/8 and 3 5/8)
- one piece at 5 1/2 x 6 1/2" (score at 3 and 3 1/2" on the 6 1/2 side and then 1/2 and 3" on the 5 1/2 side)
 
I have seen several of these made by different demonstrators, but I'm going to link to Dawn today because she not only has this project but also a video to help you if you are interested in making one of your own:)
 
The larger piece of dsp ends up making the 2 pockets shown above for inside.  I put a little tag/note card that I can write a message in one of them and a tea bag in the other...my tea bag packets were just a hair too big for the pocket size, but I have seen these with tea bags that fit perfectly (I think they must have been the bigalow ones)
 
Stamp sets used on this project were:  From my Heart, Blessings from Heaven, Lovely Little Labels, and even Chalk Talk (just for the border on the tag)


Monday, July 01, 2013

It's only a paper frame...

 
I made this paper frame this morning.  The base is a 6.25 x 6.25' piece of wisteria wonder cardstock.  Then I made the frame/matt out of a 6x6" piece of  Afternoon Picnic dsp wich I attached with stampin dimensionals, leaving room at the top to insert the picture (picture window is 4x4").  It took a bit to figure out the easel part in the back but I came up with something I'm happy with (even though it will not fold down flat...I sacrificed folding down for sturdy-ness).  I embellished the frame with some pressed clay flowers I made.  I tinted the clay with some baked brown sugar ink refill drops.  I was going for vanilla and I got a little closer to crumbcake (probably about half way between these two colours), but overall I was very happy with the result.  I also punched some butterflies out of wisteria cardstock to finish off the top right corner.

Buy 3 Get 1 Free - Designer Series Paper

Click on the flyer above to see details.

In July when you buy three packs of DSP you can get one more for FREE!

Sunday, June 30, 2013

Repurposed Journal

Inspired by page 106 of the new catalog, I repurposed this journal today.  I had bought a few board book journal from the clearance bin at Michael's a while back.  They had a nice heavy board book cover, but I didn't like the design on any of the covers, but I thought for < $1 each I could repurpose them. 

I covered the cover of the journal with a piece of sahara sand card stock.  I was debating between that and very vanilla, but I was getting low on vanilla and this rougher colour went well with the edges of the board book cover.  I stamped the Ex Libris background stamp in crushed curry (one of the new colors this year) and then I stamped 'God is love' from the Trust God stampset in strawberry slush below that.  The butterflies were punch with the large and small butterfly punches out of Bermuda bay card stock (also a new color this year).

I did the stamping before affixing the cover to the journal with tombow mon multi glue.  I measure the journal I was using and then cut the sahara sand  card stock to 10.5" (scored at 5" and 5.5") by 7" (ever journal is different, so always measure first!)

Tuesday, June 25, 2013

Congratulations

This is the card I made for my daughter's friend for graduation.  I used the Layered Labels stamp set and apothecary accents framelits, and the new Dictionary background stamp.  Inks used are:  raspberry ripple, summer starfruit and basic black.

Sunday, June 23, 2013

For You

Monday is a special day for my daughter and this was the card I made for her.  I used the new chalk talk stamp set and coordinating framelits and also the postage due stamps.  I also made the flower embellishments with the pressed clay.  The butterflies were punched with the large and small butterfly punches.